


Hello Kitty® x Aprés Gel-X® Nail Extension Kit
Hello Kitty® x Aprés Gel-X® Nail Extension Kit
Couldn't load pickup availability
Meet everyone’s favorite best friend, Hello Kitty®—now in an exclusive Aprés Gel-X® Kit.
In celebration of Hello Kitty’s 50th Anniversary, Aprés and Sanrio® have teamed up to create a limited-edition Hello Kitty® Gel-X® Kit. This bright, playful vegan leather case is inspired by Hello Kitty’s signature red, white, blue, and yellow palette—and it’s packed with exclusive must-haves you won’t find anywhere else.
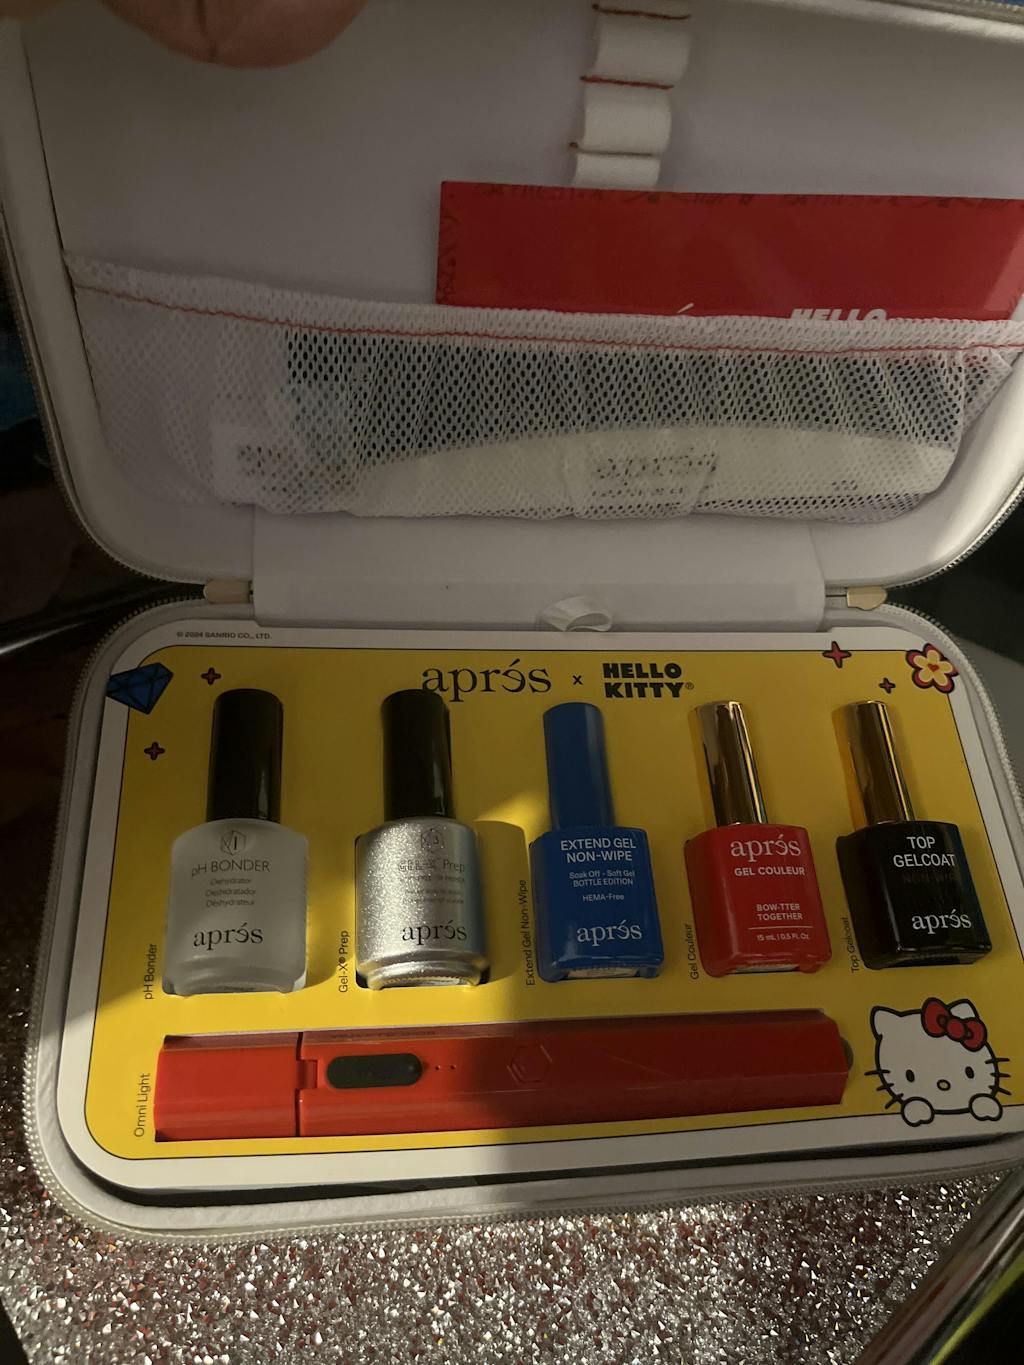
Each kit includes a brand-new exclusive Gel-X® Tip, Natural Almond Medium Bow Cut Out, plus a custom red Gel Couleur shade, “Bow-tter Together.” Get ready to meet your new best friend.
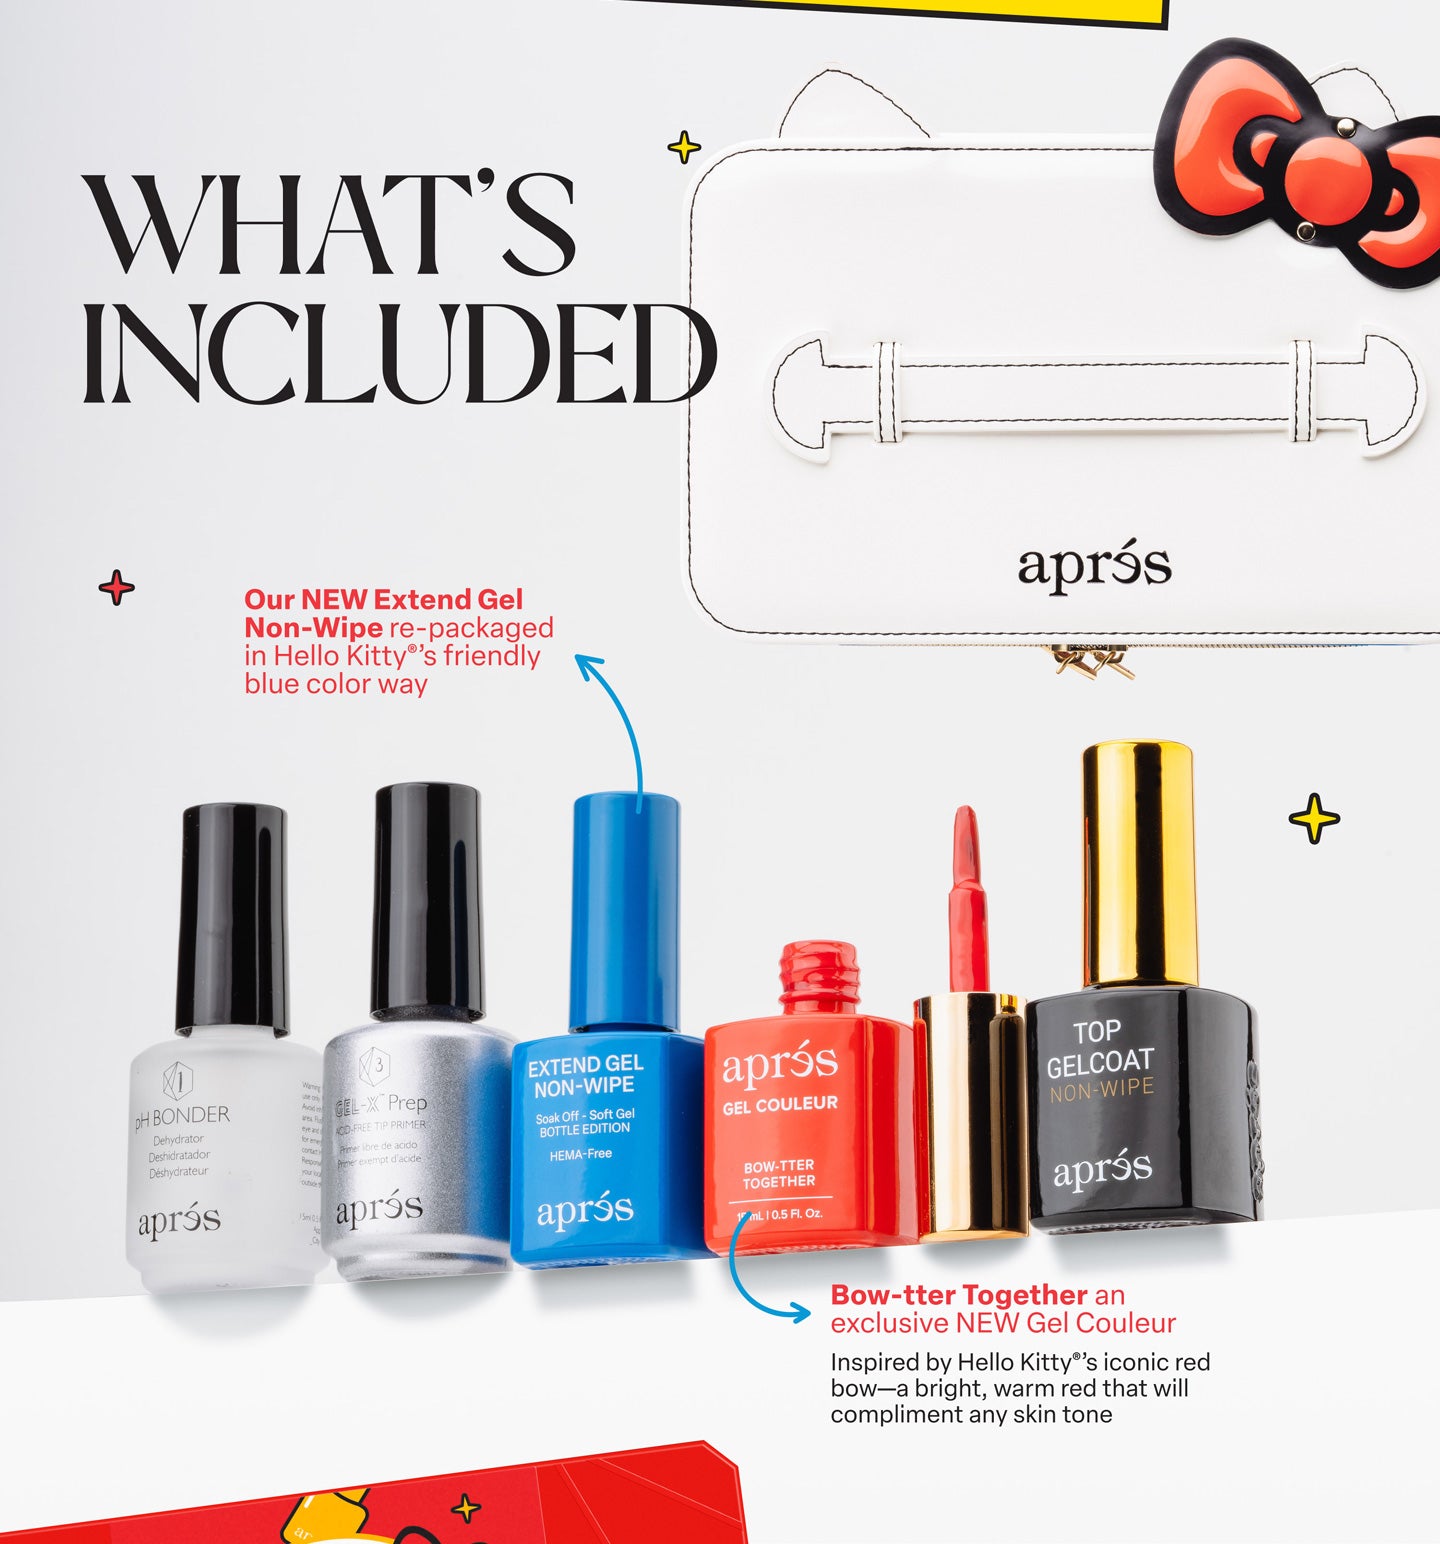
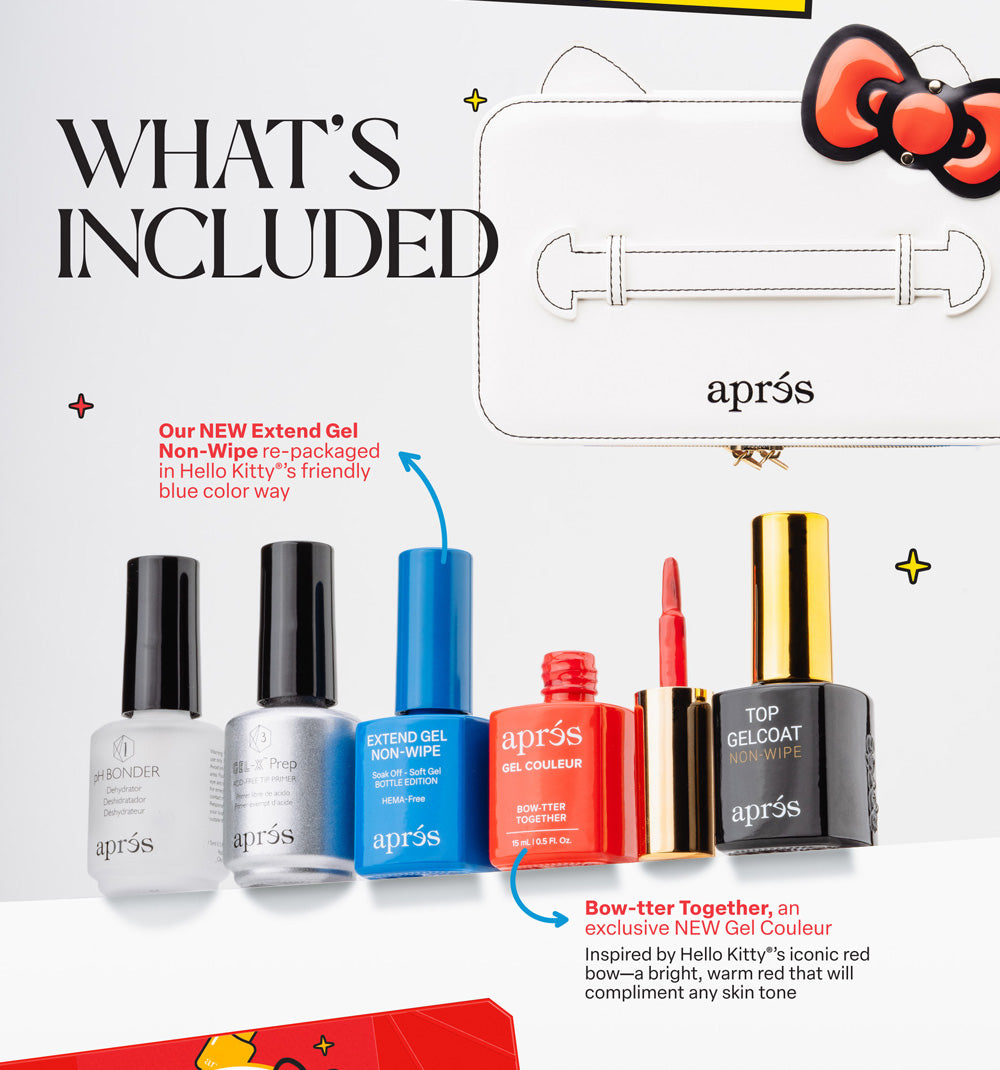
[included]What’s Included
- 15ml pH Bonder
- 15ml Gel-X® Prep
- 15ml Hello Kitty® Extend Gel Non-Wipe (Exclusive)
- 15ml “Bow-tter Together” Gel Couleur (Exclusive)
- 15ml Non-Wipe Glossy Top Gelcoat
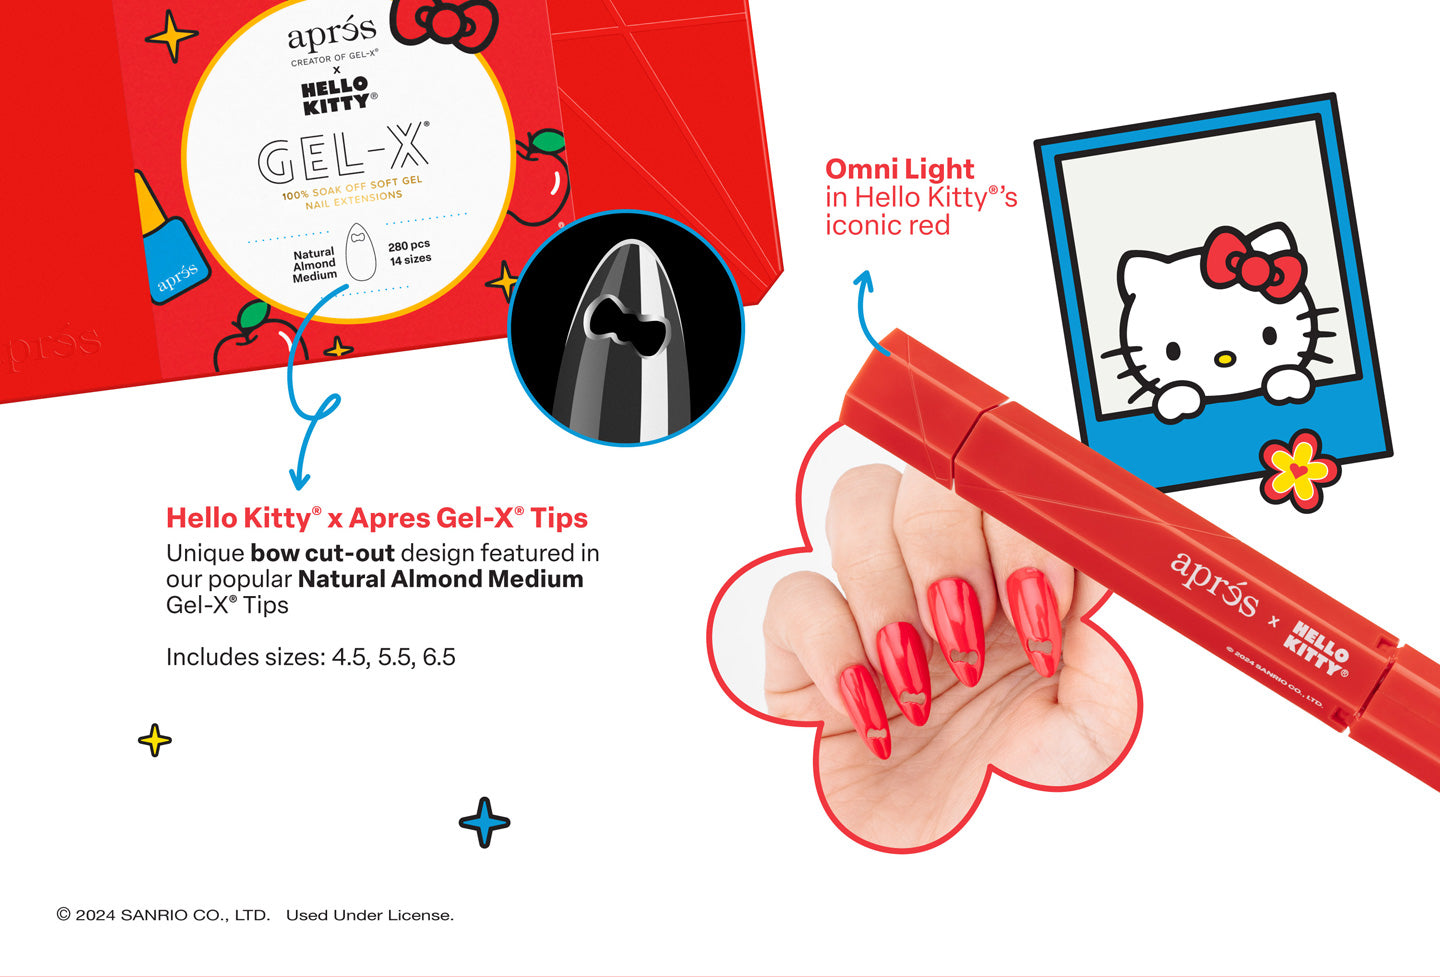
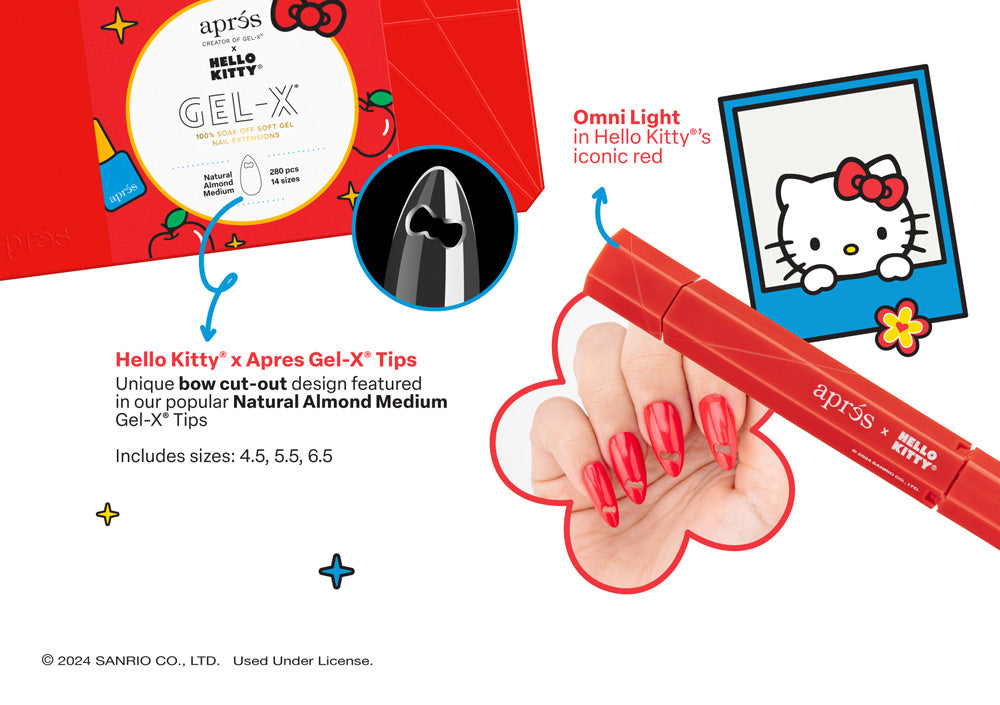
- Sanrio® Omni Light (Red)
- 100/180 White Nail File
- 100/100 White Nail Buffer
- Hello Kitty® x Aprés Gel-X® Natural Almond Medium Bow Cut Out Tips
(280 pcs, 14 sizes) - Hello Kitty® Vegan Patent Leather Case
Directions
- Prep the natural nail
- Apply pH Bonder
- Scrub Gel-X® Prep into the underside of the Gel-X® Tip
- Apply a thin layer of Extend Gel Non-Wipe onto the natural nail
- Cure for 30 seconds
- Apply a bead of Extend Gel Non-Wipe to the underside of the Gel-X® Tip
- Carefully apply the tip onto the nail
- Flash cure with the Omni Light for 10 seconds
- Cure the entire hand in an LED lamp for 30 seconds
For Color Application
- Scrub Gel-X® Prep onto the surface of the Gel-X® Tip
- Apply a thin layer of “Bow-tter Together”
- Cure for 30 seconds
- Apply a second coat
- Cure for 30 seconds
- Finish with Aprés Non-Wipe Glossy Top Gelcoat
- Cure for 30 seconds
Caution
- Keep out of reach of children. This is not a toy.
- For professional use only.
- Discontinue use if sensitivity or irritation occurs.
How to Use Omni Light Safely
Follow these guidelines to ensure safe use and to prolong the lifespan of your Omni Light battery.
Charging Guidelines
- Always use the charger provided with the Omni Light (5V2A certified).
- Unplug within 1–2 hours after fully charged.
- Recharge promptly when battery is low—do not store at 0%.
- Do not charge unattended.
- Do not use the Omni Light while charging.
Where to Charge
- Charge in temperatures between 10°C–30°C (50°F–86°F).
- Ensure proper ventilation—avoid enclosed spaces.
- Do not store or charge in high heat environments.
- Keep away from liquids and metal objects.
- If unused long-term, recharge at least once every 3 months.
Troubleshooting
- If overheating occurs, unplug immediately.
- If swelling, odors, or deformation appear, discontinue use and contact Customer Service.
- If charging fails, test another charger and contact Customer Service if unresolved.


Customer Reviews
This collection is so cute. I use the tips in my girls and they love the bow design. I really recommend
This collection is so adorable. I use it on my girls and the bow tie gives it a nice touch. Super cute.
Love this kit.
Awesome
Really cute and has a lot of items